
Flower Letter DIY
Written by Thompson's Flower Shop
I love baby showers, there is something magical about the excitement and anticipation as you gather with friends and family to celebrate the upcoming arrival of a precious child. It is a romantic notion that should be carefully planned out as every small detail matters. All baby showers are not created equal, whether you are planning your own baby shower or surprising a friend, the event should be unique and a reflection of the parents' personalities.
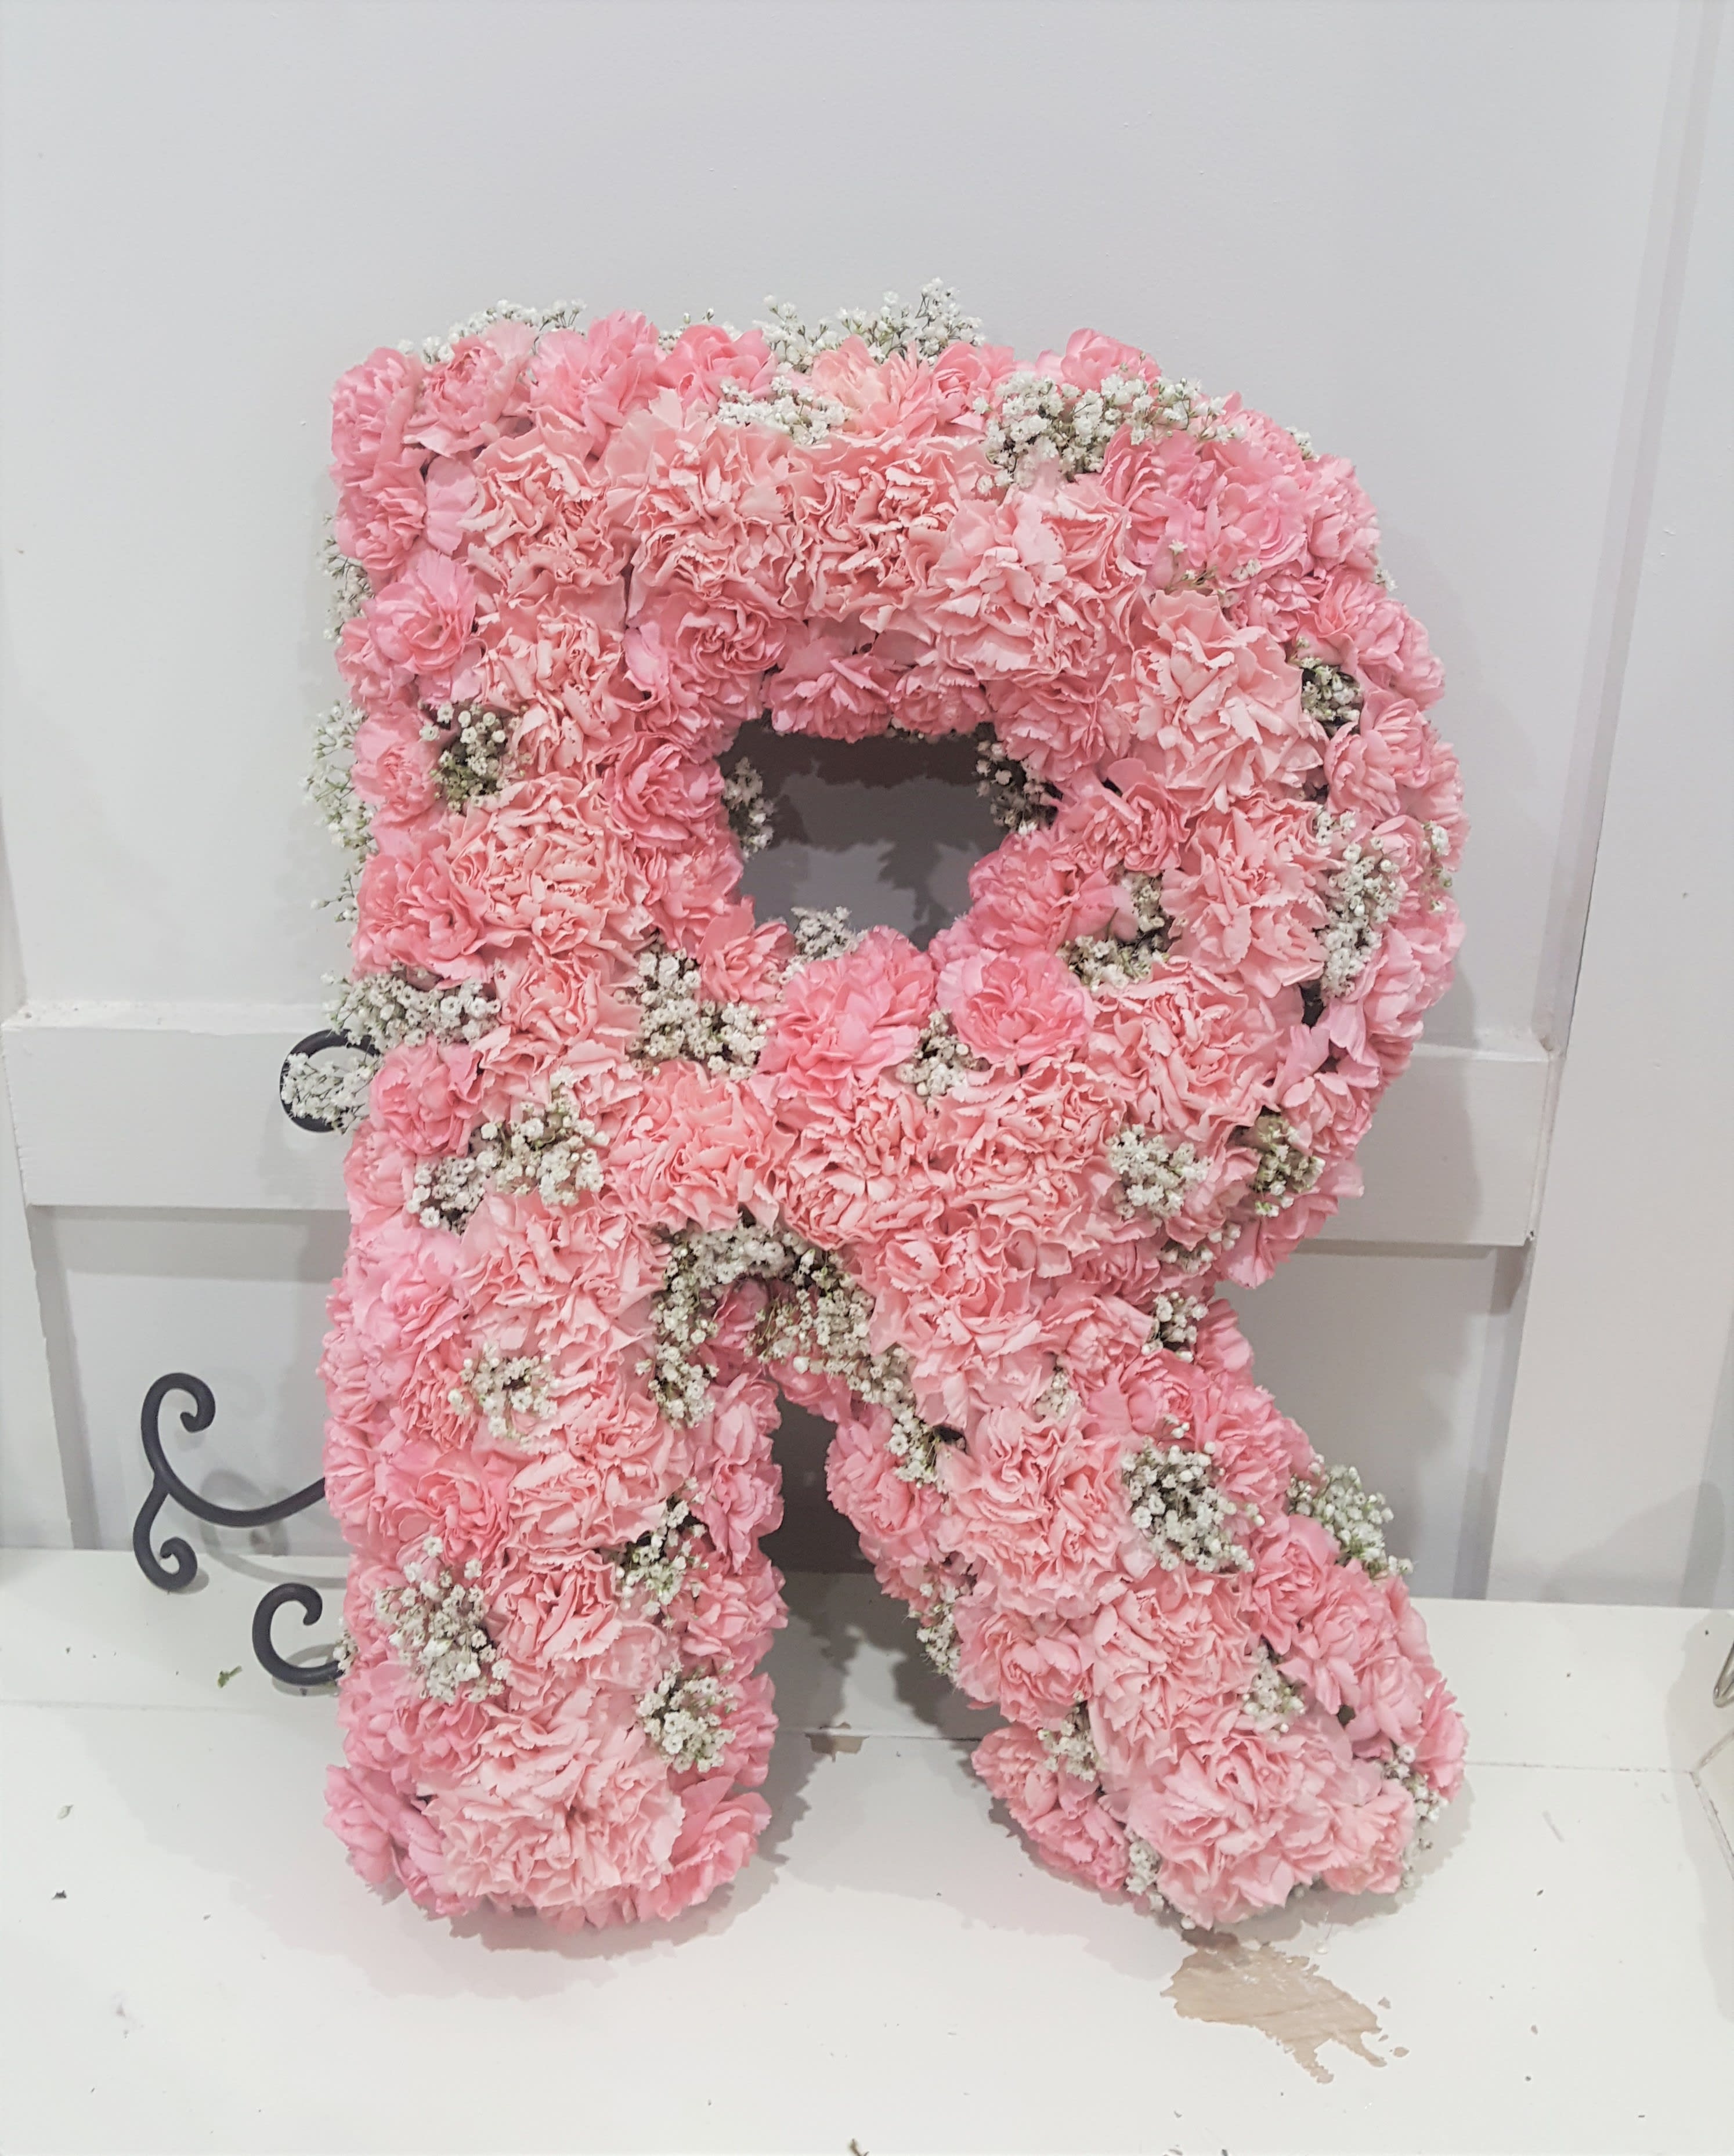
Flower letters are an elegant twist to the traditional baby shower décor, they are an exquisite accent that is sure to impress your guests. Today I will walk you step by step on how to create your one of a kind masterpiece!
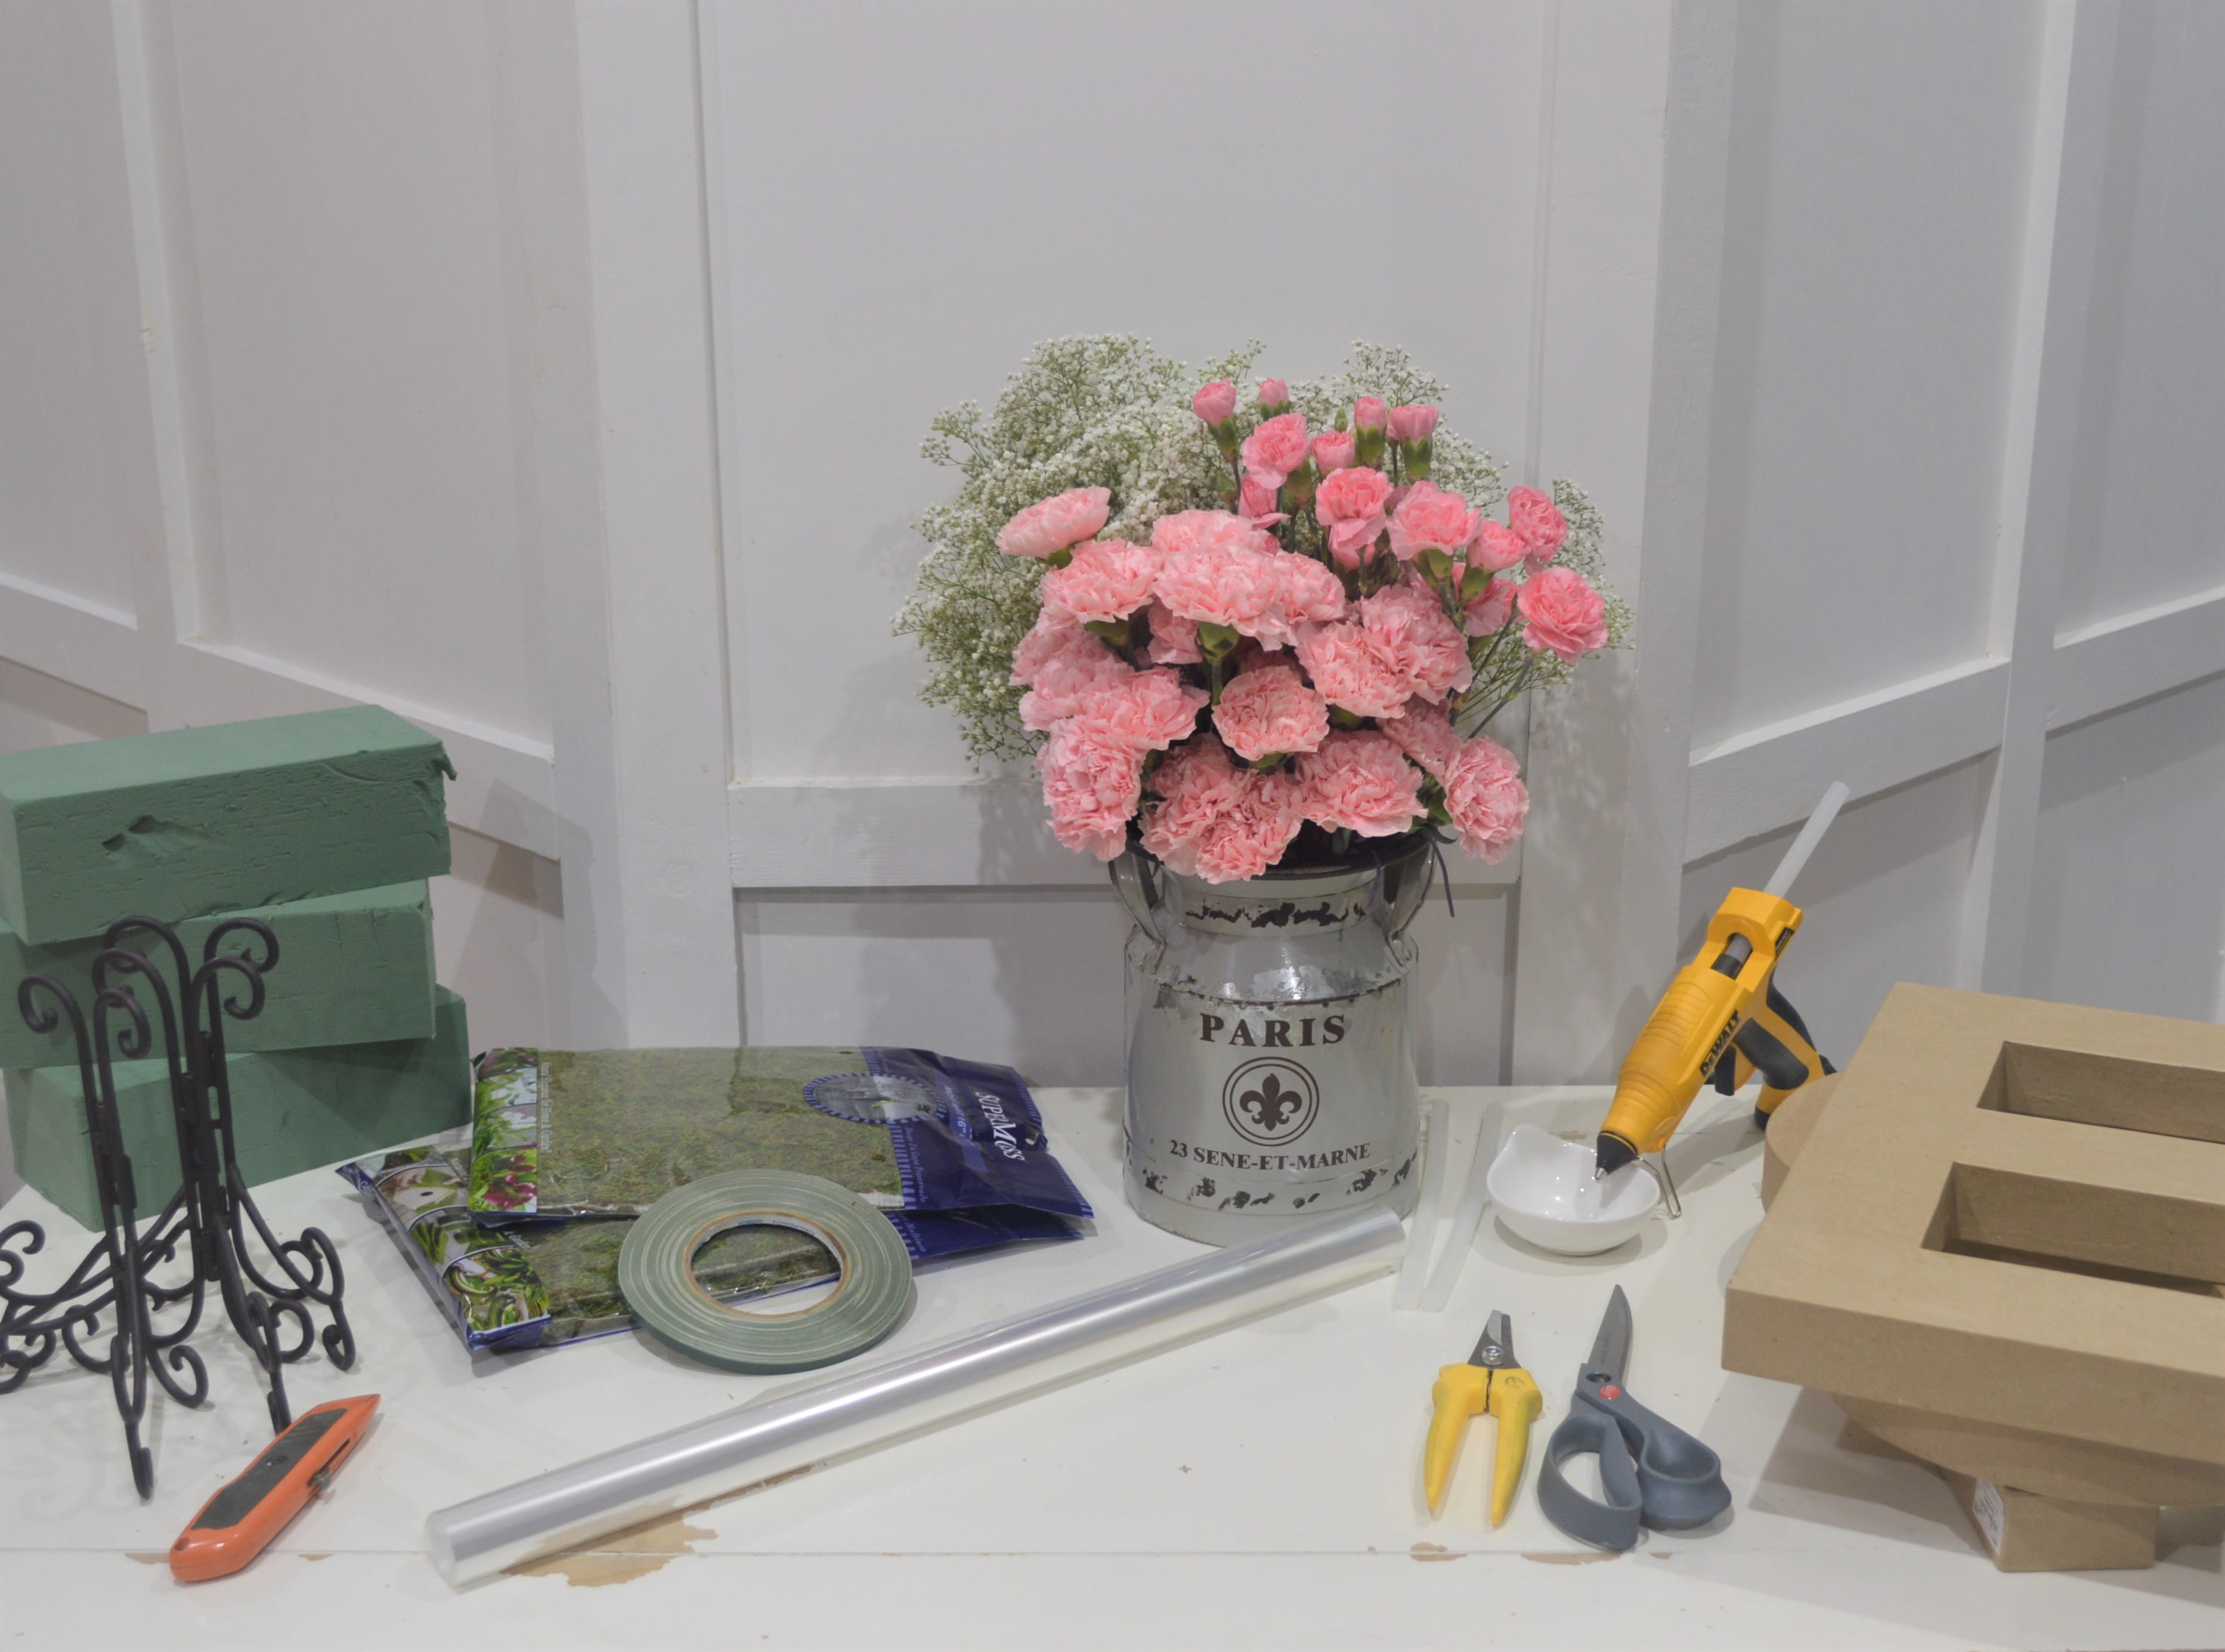
Before we get started, here's a list of items you'll need:
- Glue Gun
- Glue Sticks
- Waterproof Tape
- Scissors
- Floral Sheers (Optional)
- Box Cuter
- Sheet Moss (1 Pkg. Per Letter)
- Frame Stand (1 Stand Per Letter)
- Cellophane
- Extra Heavy Duty Cardboard or Wood Letters
- Fresh or Silk Flowers
- Oasis Foam (Dry Sahara Foam If Using Silk Flowers)
- Water to Soak Oasis Foam
These items can be found at your local florist and craft store.
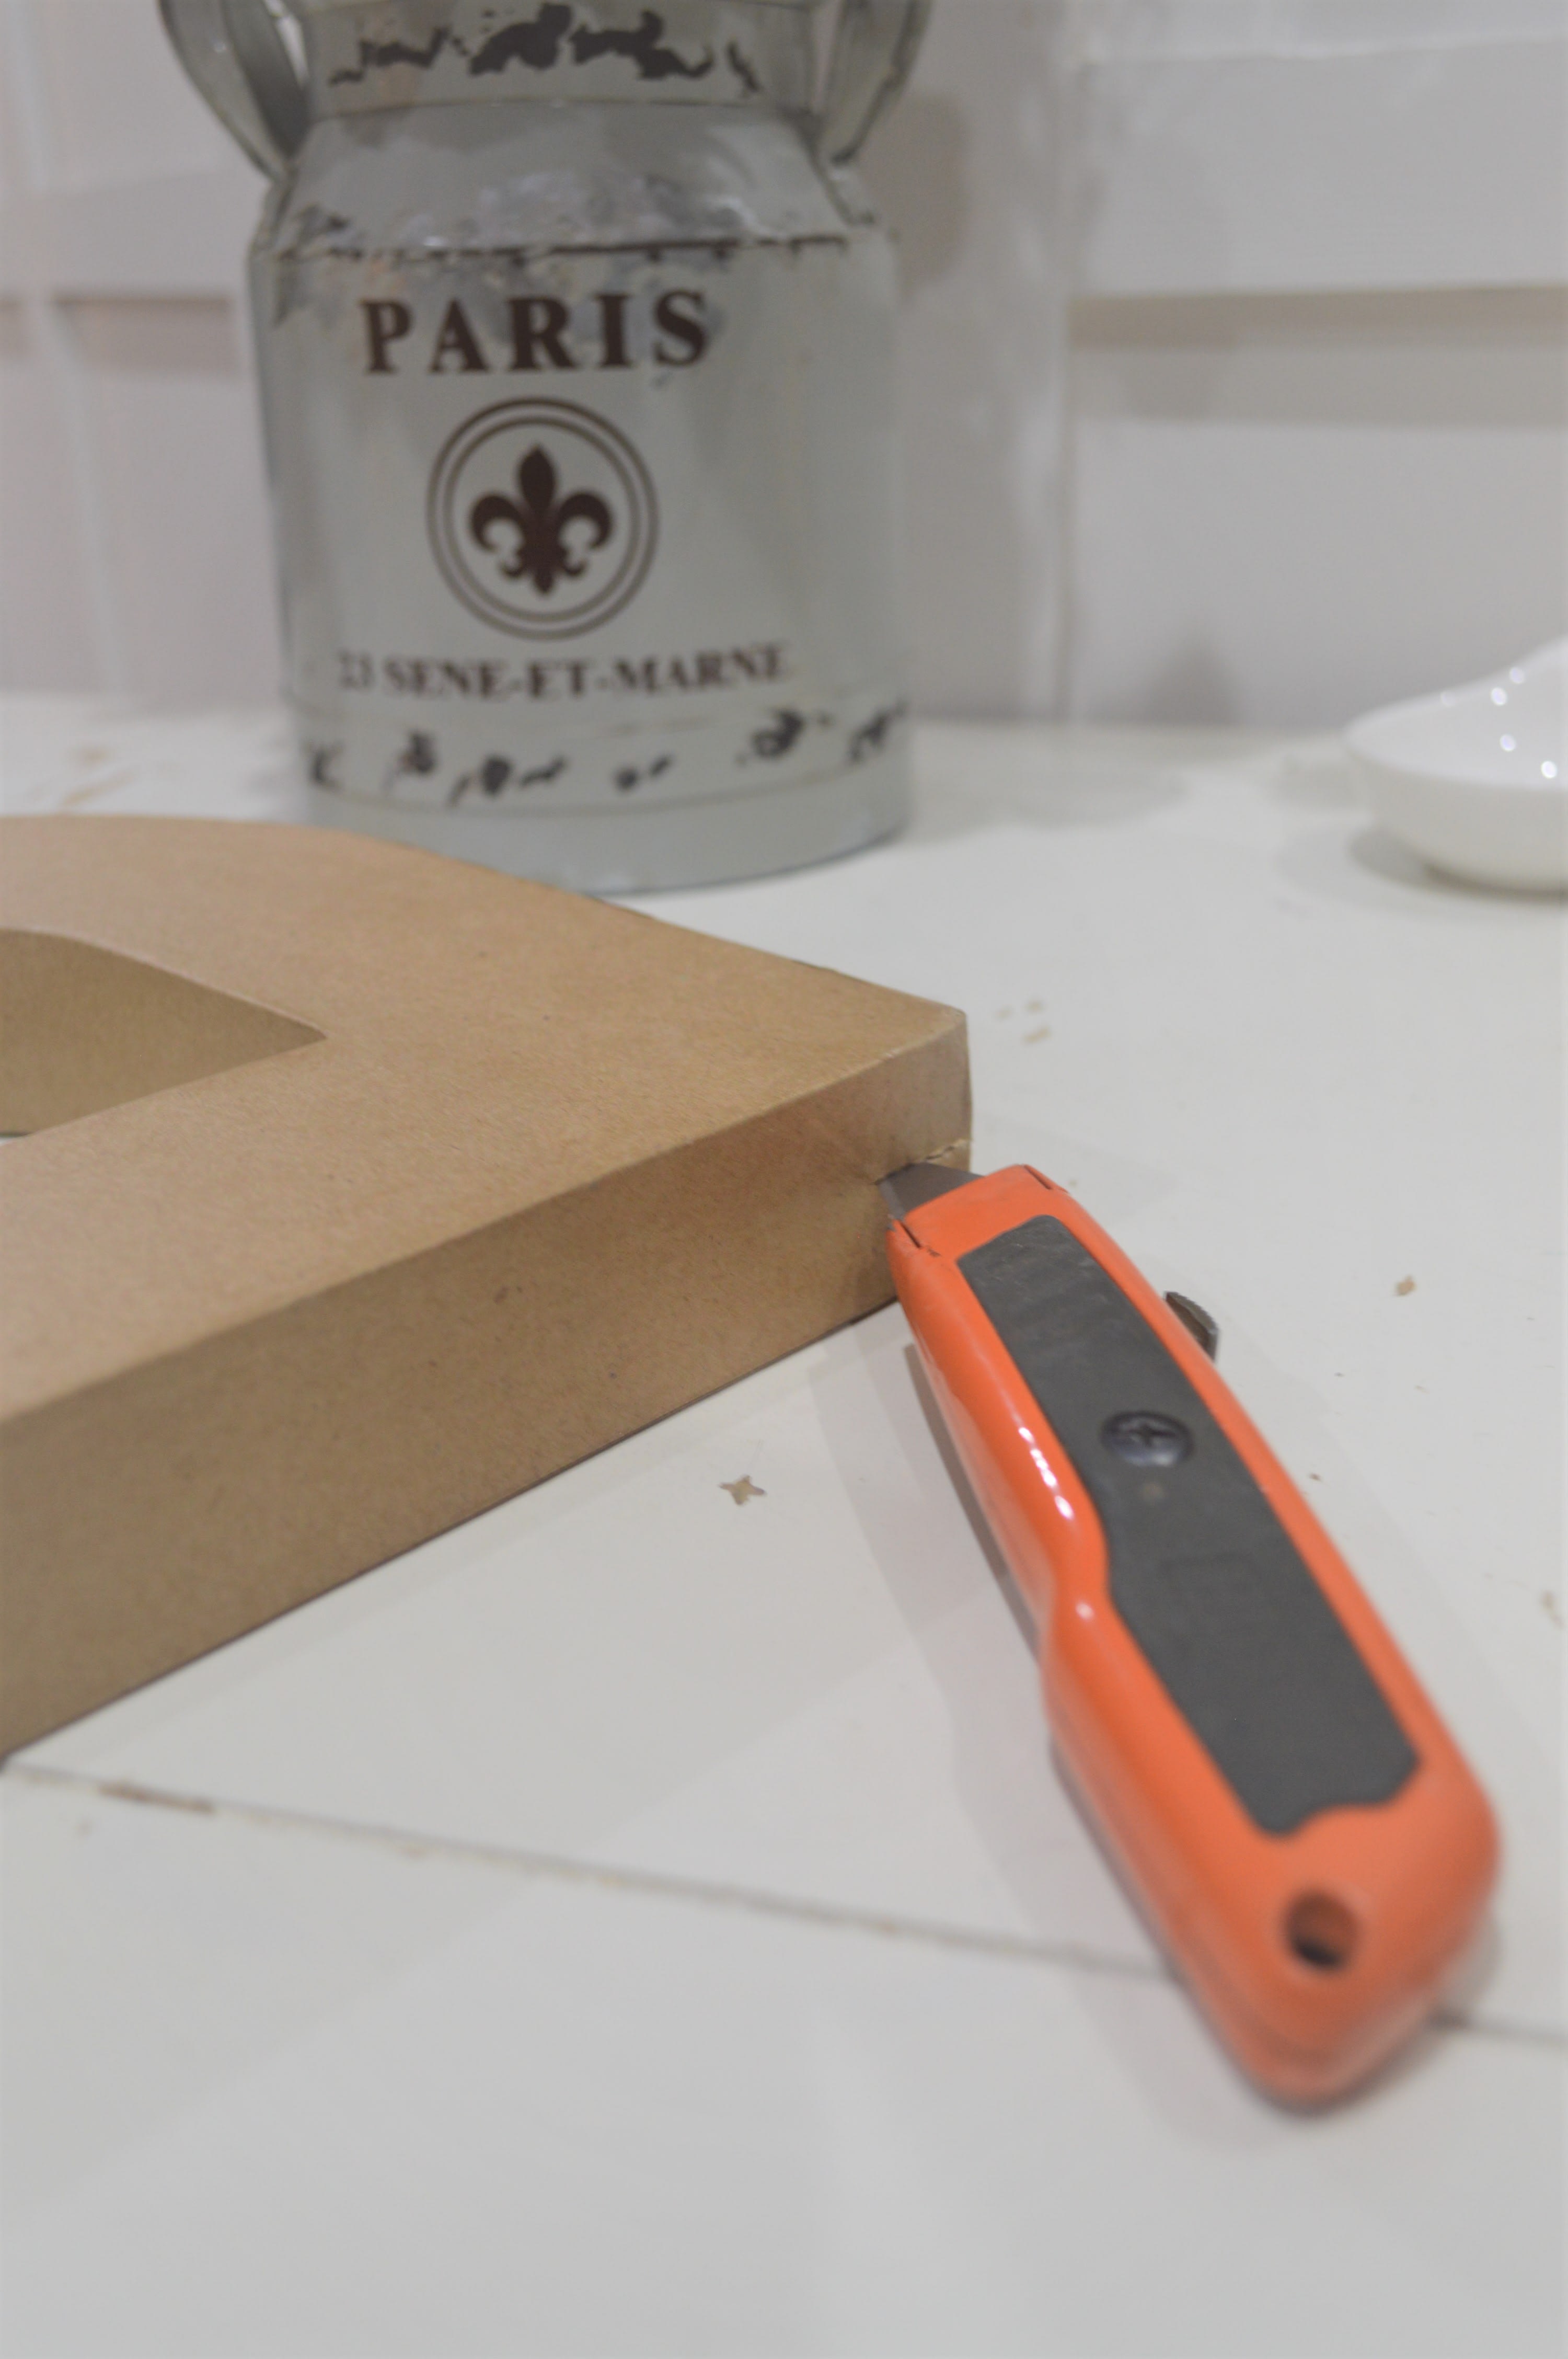
Step 1 | (If you are using wooden letters, skip this step) Take the box cutter and trim the top off each letter as little as possible, as to expose the inside cavity.
Step 2 | Wrap the inside of each letter with cellophane and secure with waterproof tape to keep moisture out (don't worry about cosmetic imperfections).
Step 3 | (If using Sahara foam, skip this step) Soak oasis foam by filling up a large container with plenty of water and allowing the oasis to soak slowly, it will sink to the bottom once it is ready (do not force oasis by pressing down, this will create dry spots in the center).
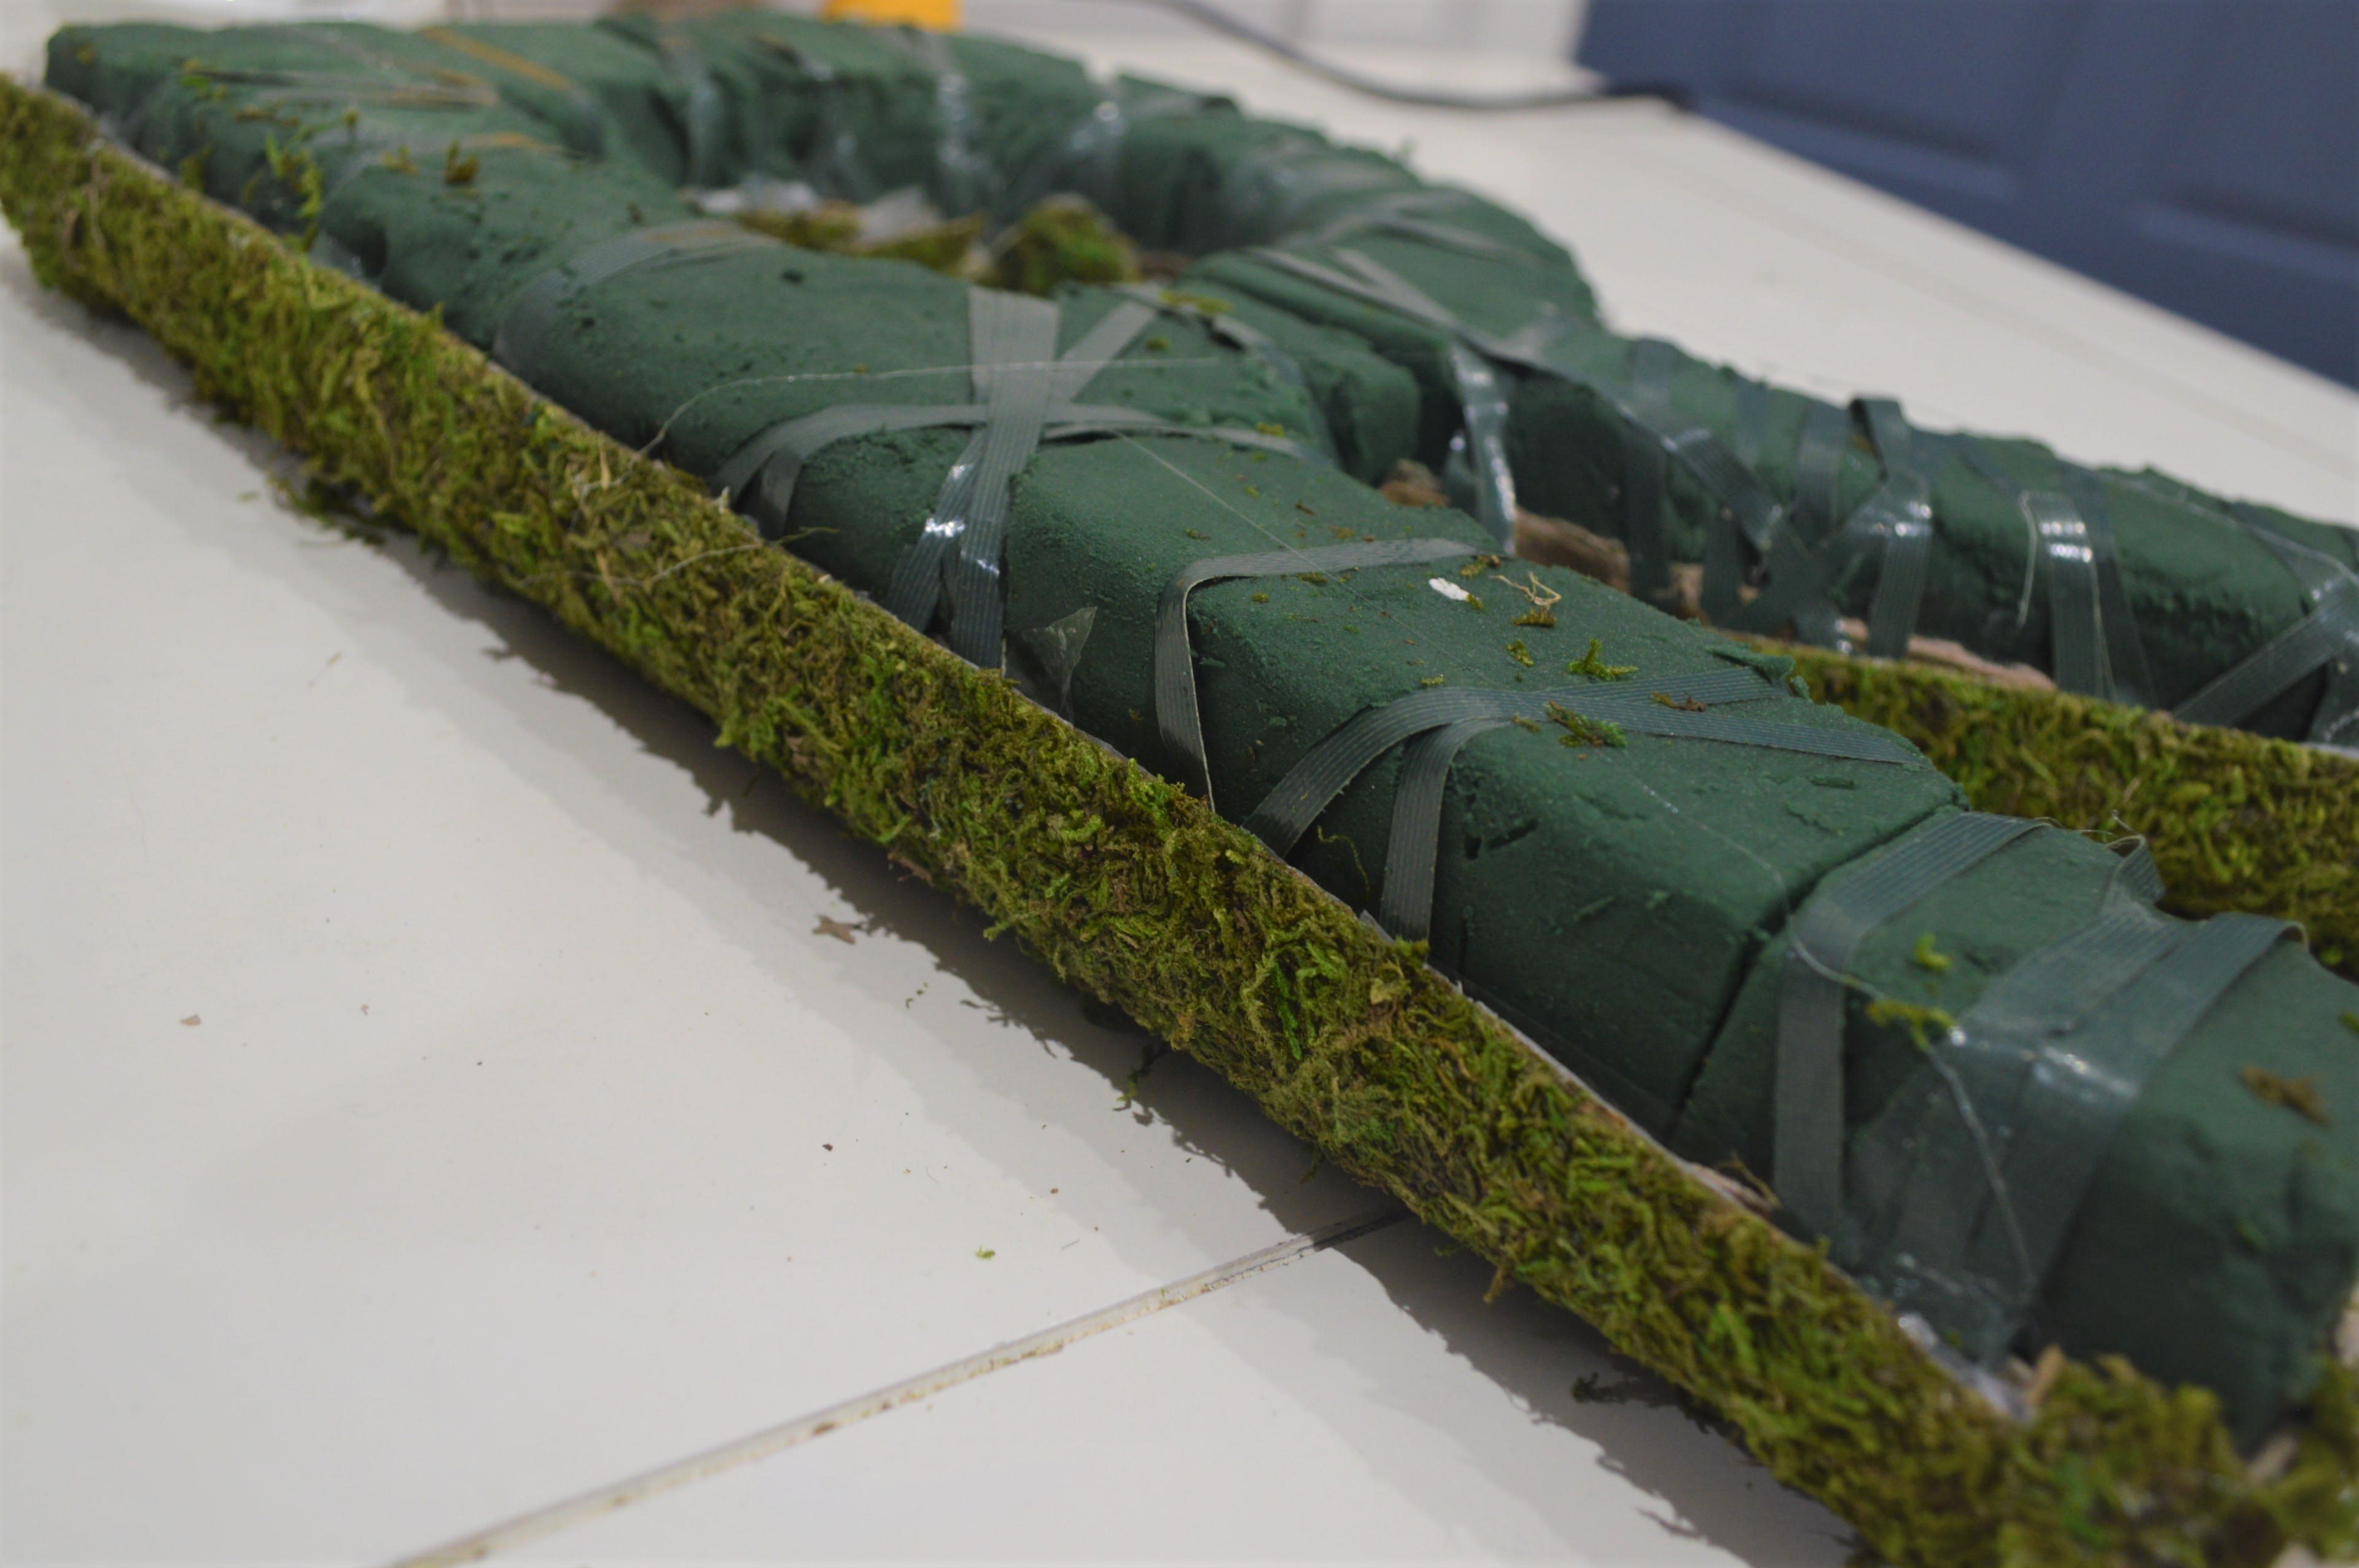
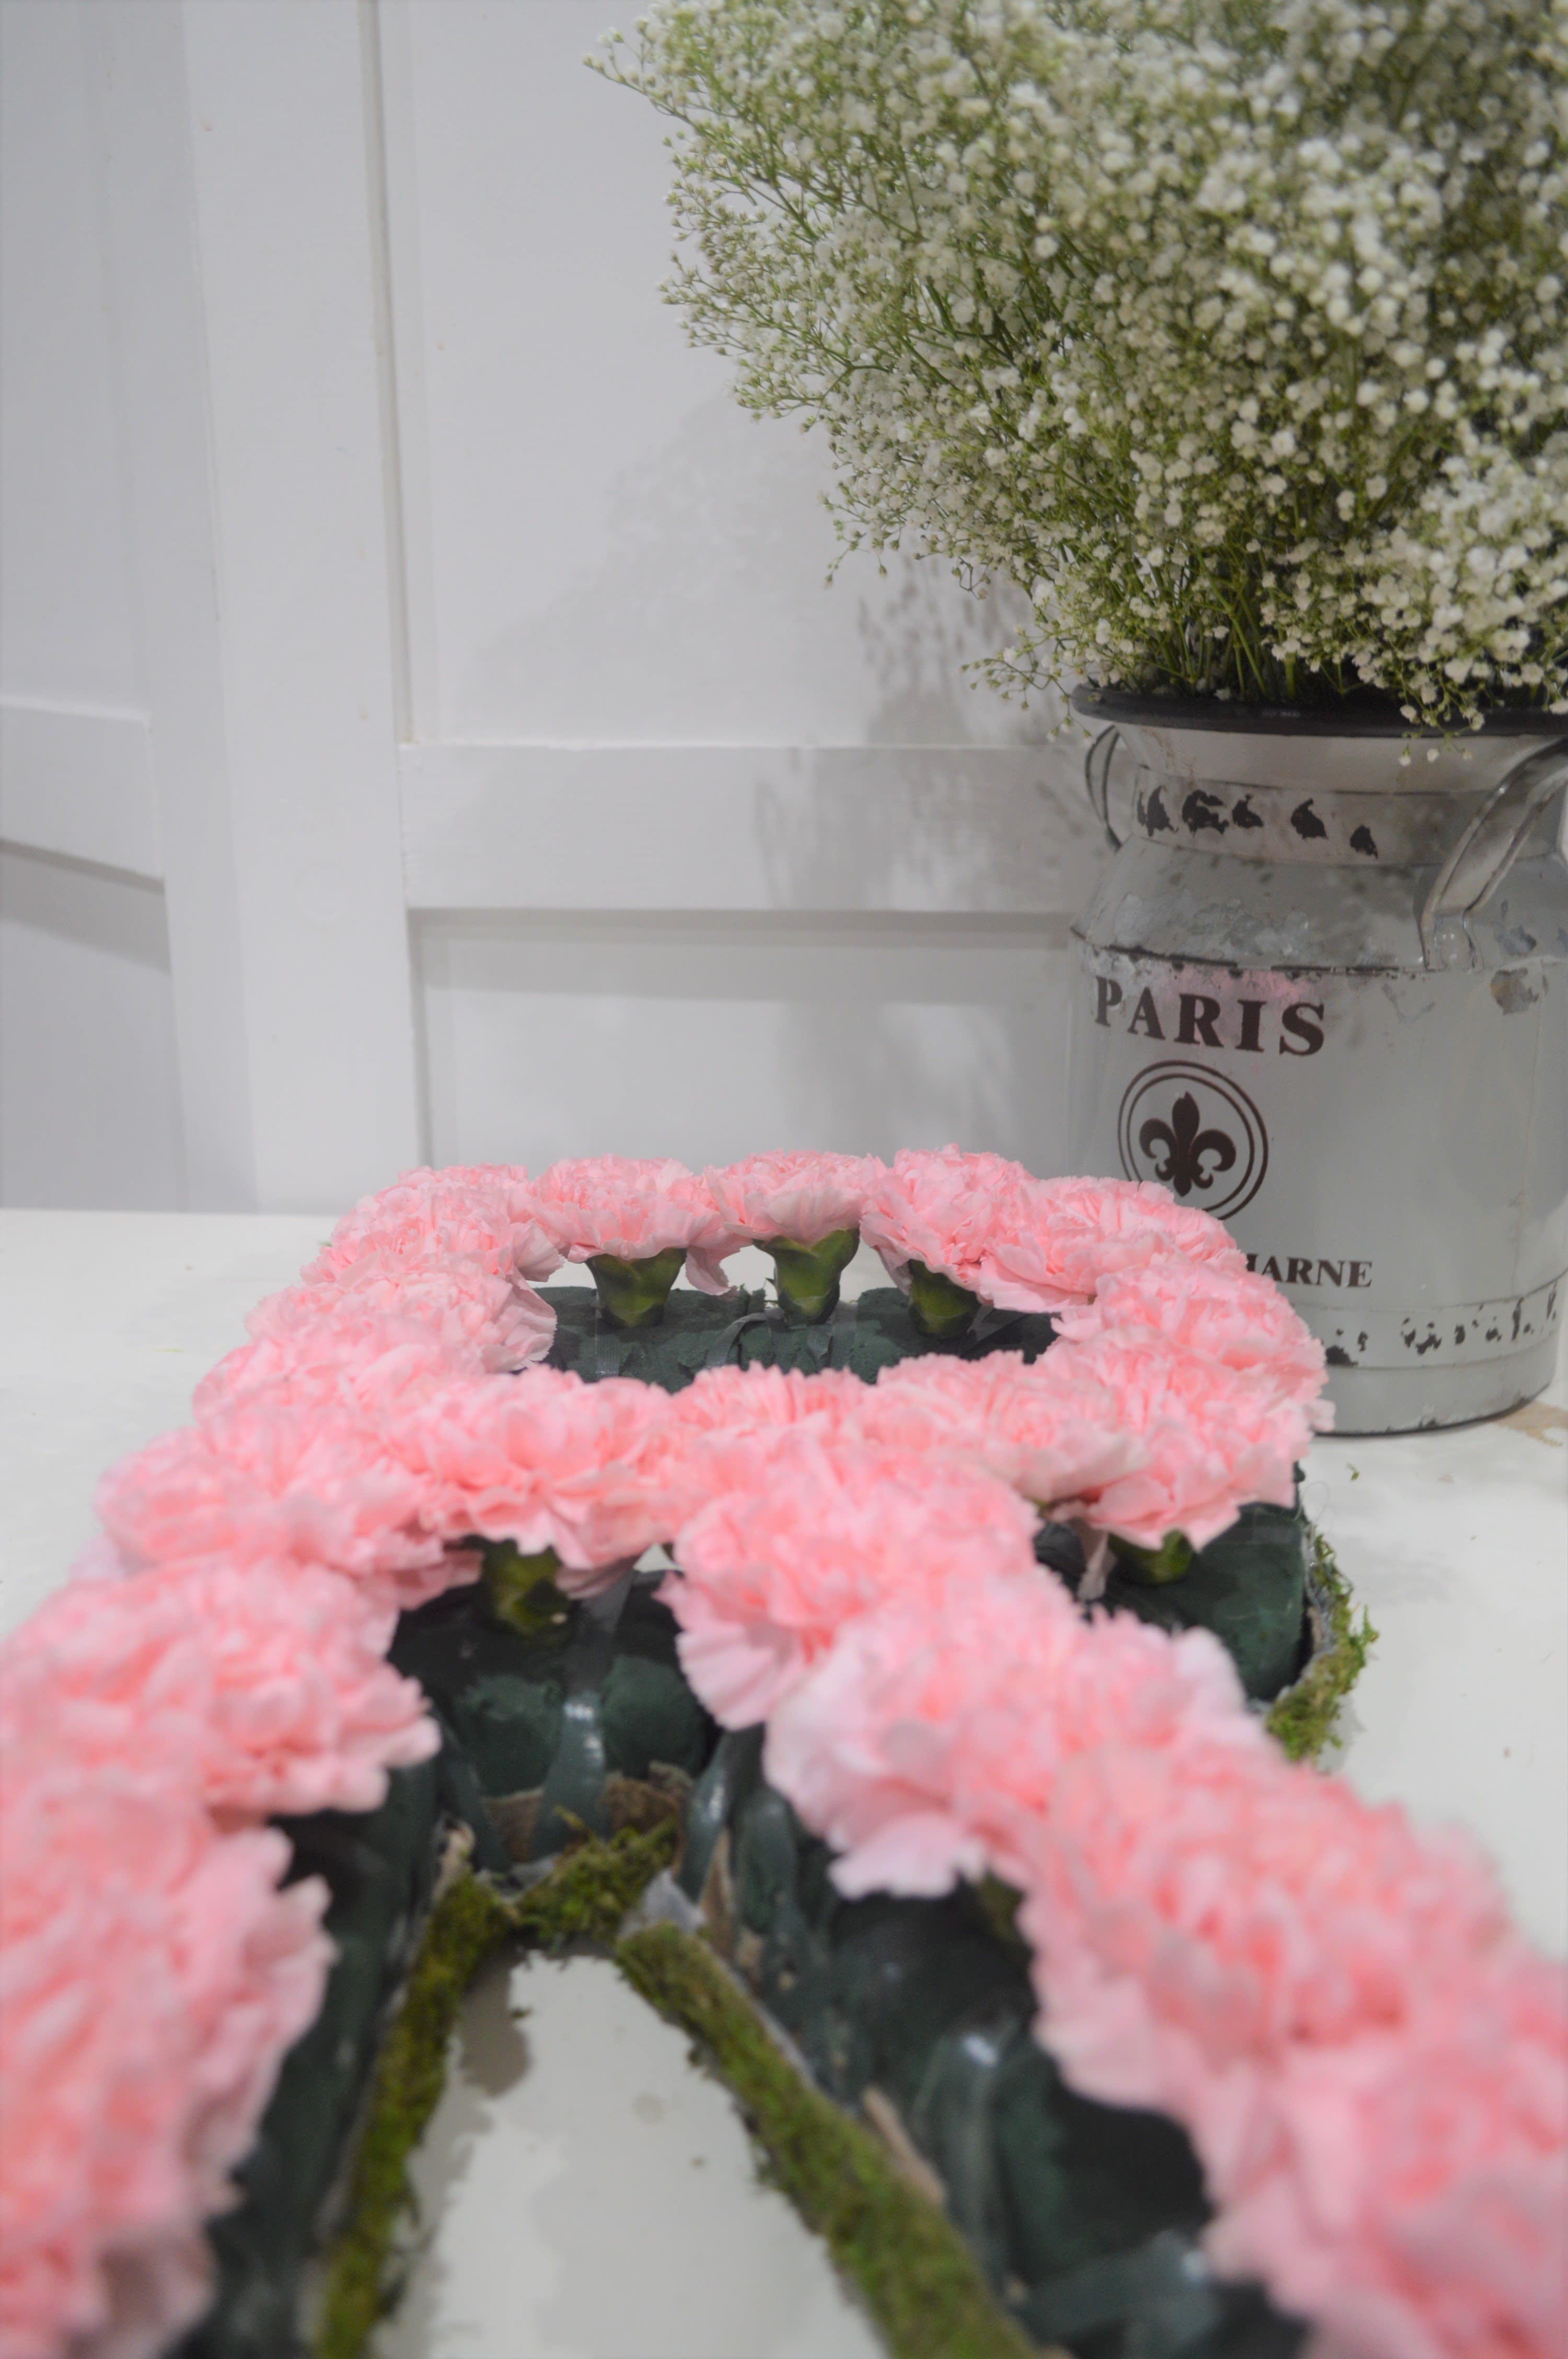
Step 4 | Cut oasis to the shape of each letter (it should be about 2 inches deep).
Step 5 | Tape oasis in place using waterproof tape (don't worry about cosmetic imperfections).
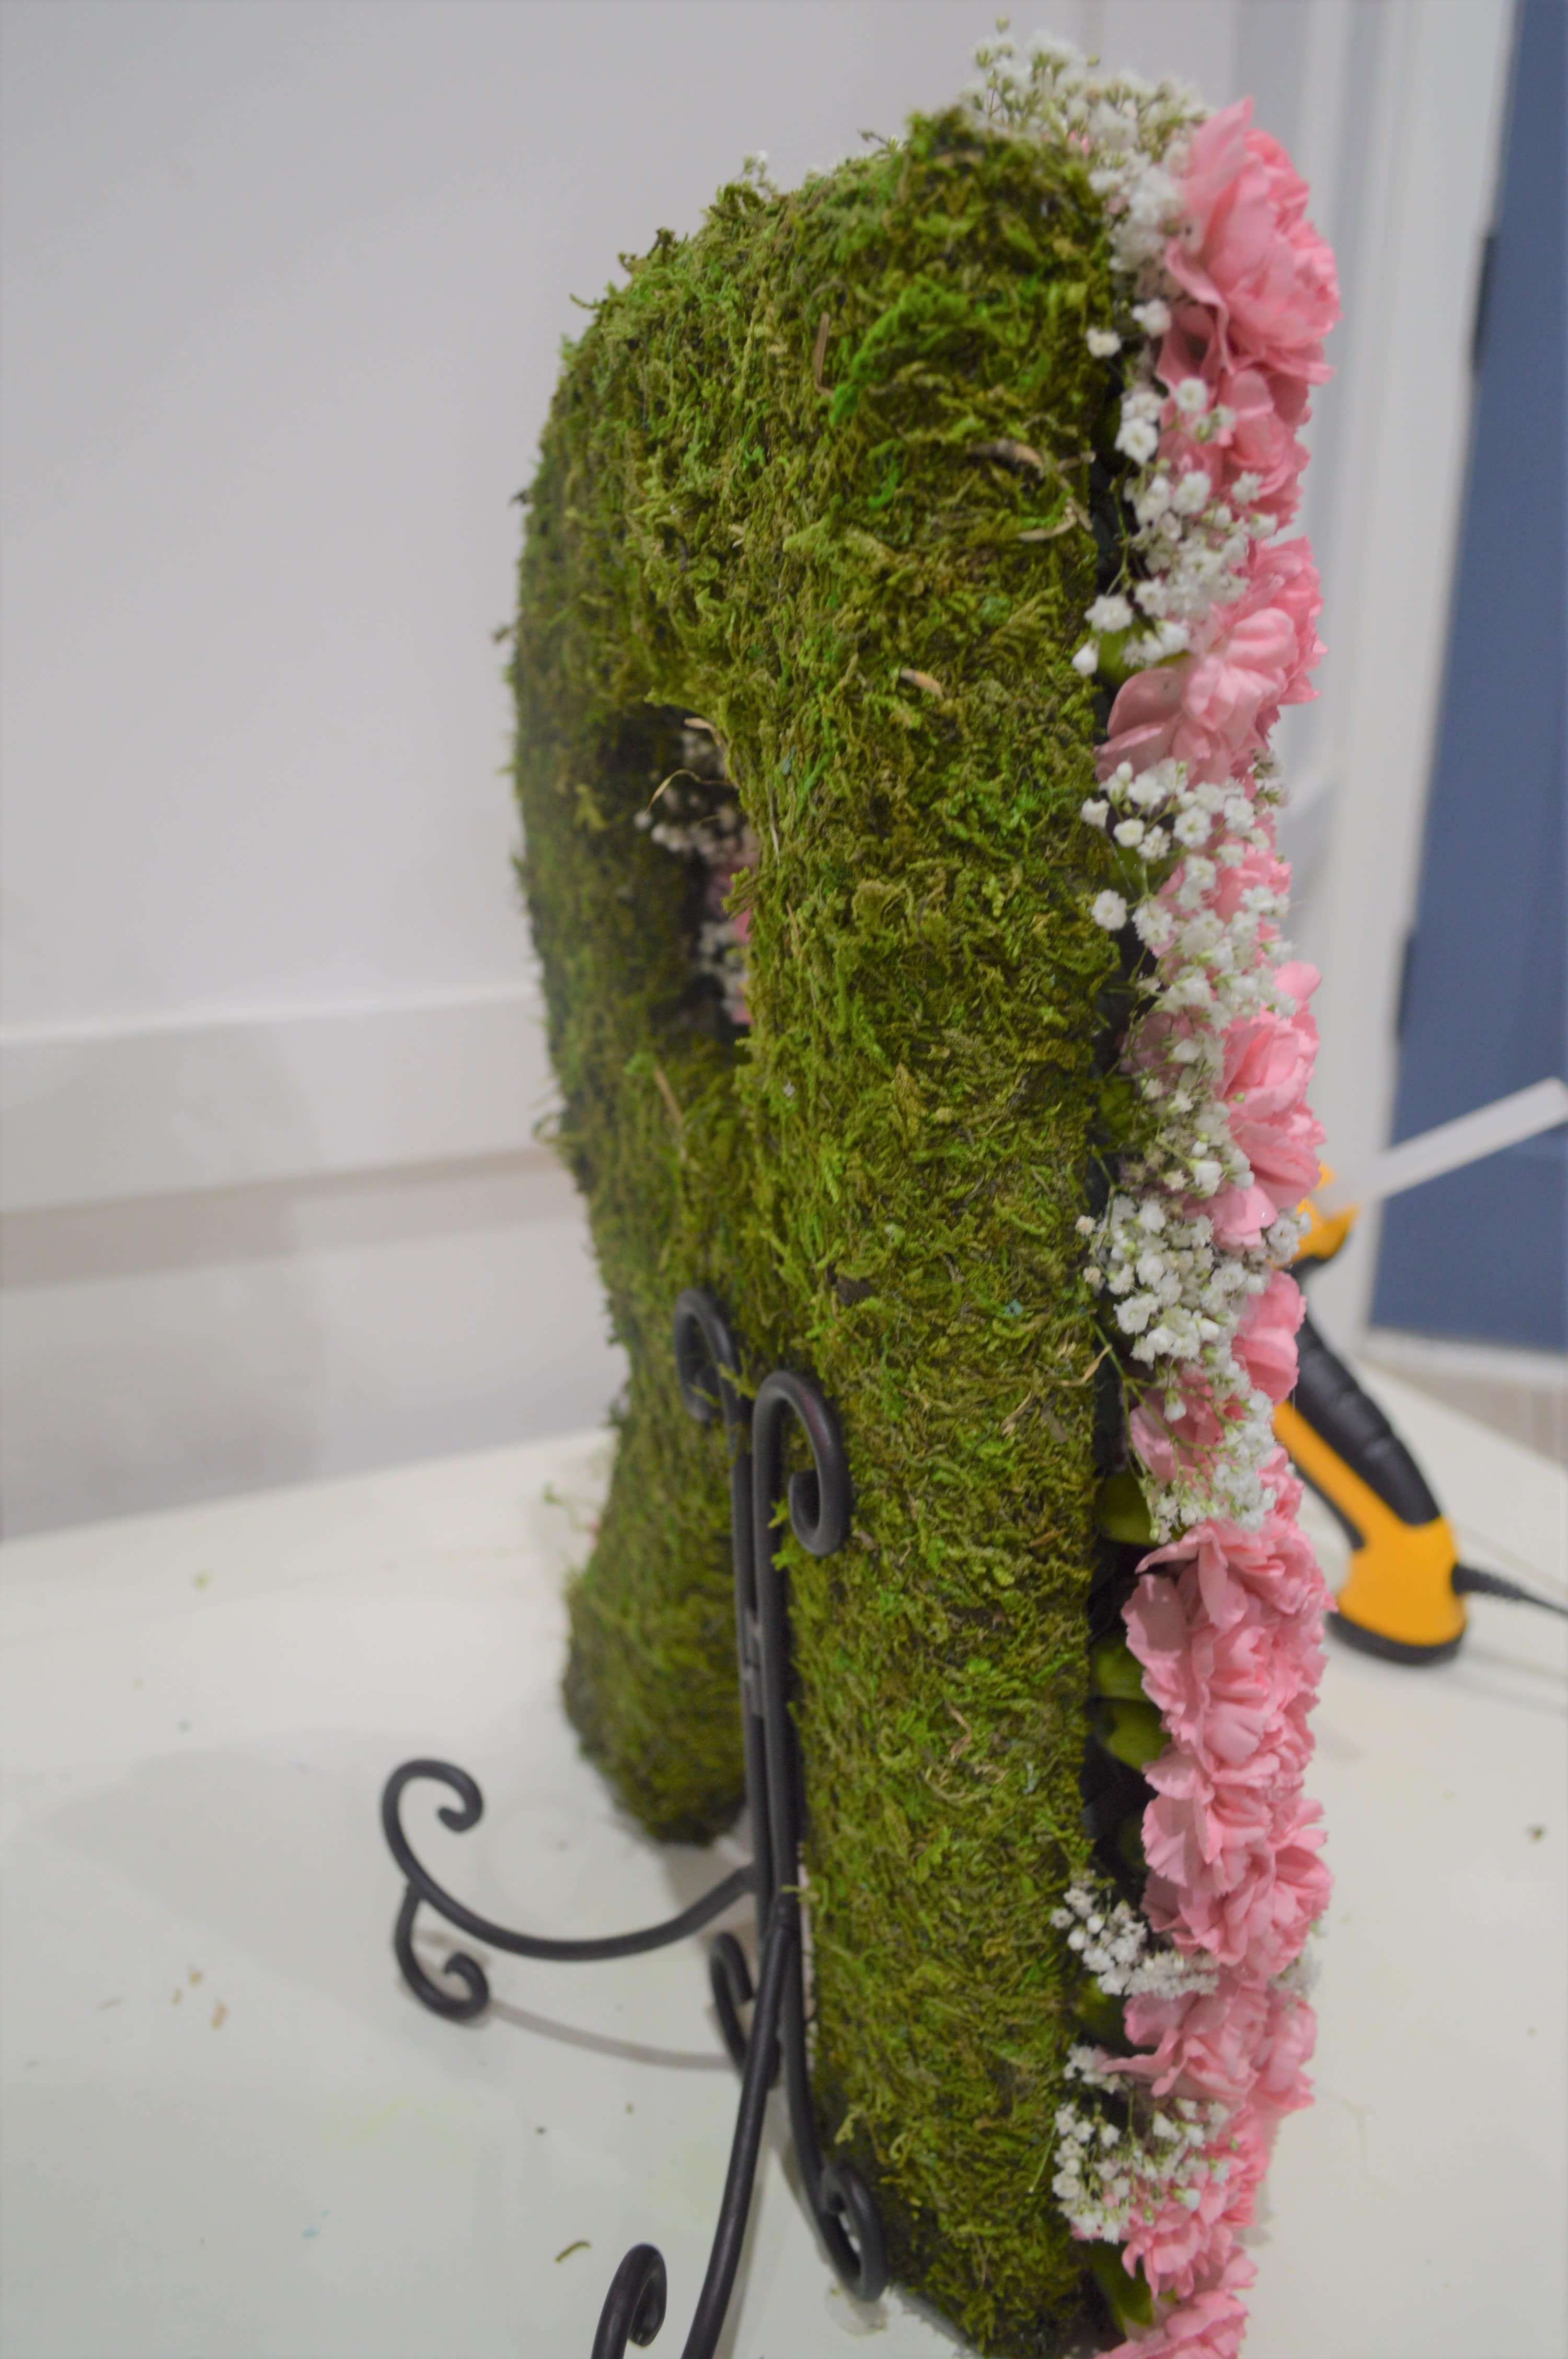
Step 6 | Using sheet moss and glue gun cover the back of each letter, cut as needed.
Step 7 | Cut the stem of each flower to about one inch and place in the center of the foam creating a pattern.
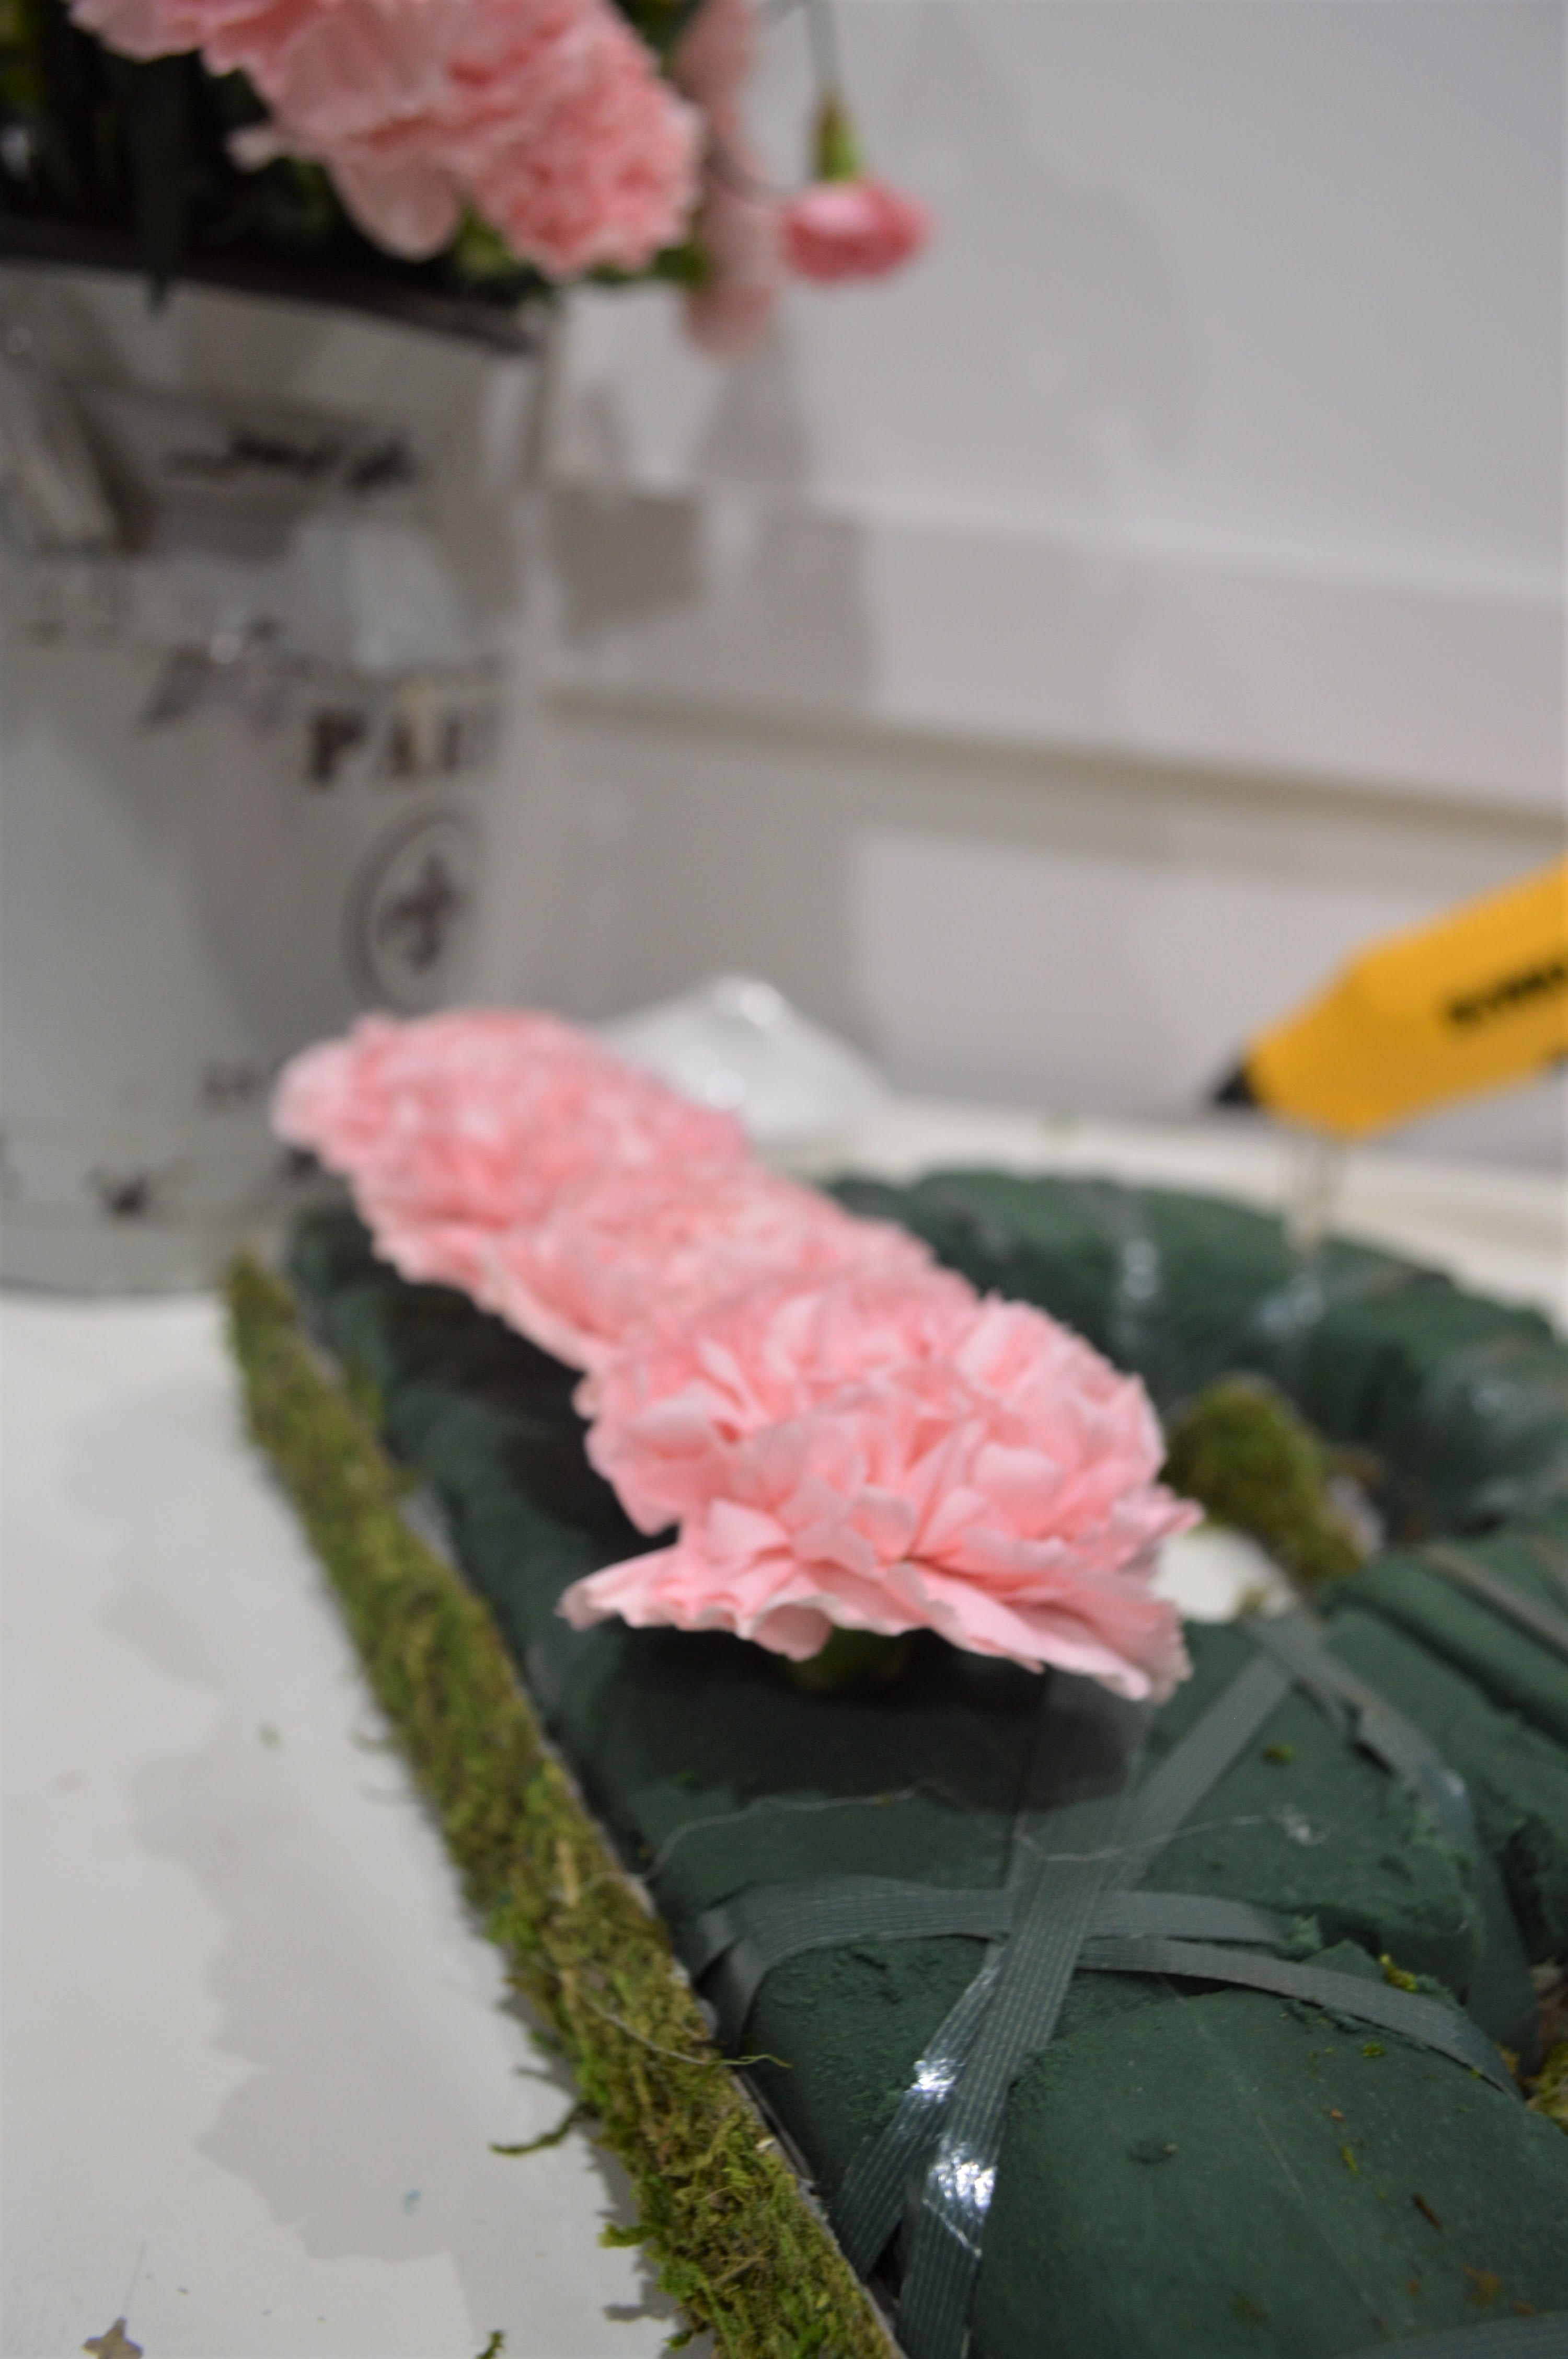
Step 8 | Finish by covering exposed foam and sides.
Step 9 | Using a glue gun attach frame stand to each letter by finding its center mass and allowing the letter to free stand.
Step 10 | Have fun! Make it your own!!!
Thank you for joining us today, please don't forget to follow us on social media and come back for more projects and flower fun!


